
Schematic and PCB Design: Execute DRC
A Design Rule Check should be executed on the migrated designs to confirm the status of the data within the eCADSTAR applications. DRC commands are available in both eCADSTAR Schematic Editor and eCADSTAR PCB Editor.
For Schematic Editor
- Launch eCADSTAR Schematic Editor.
- Select File > Open to launch the Open dialog.
- Browse to the location of the migrated design and select the [design].sdes file.
- Click Open to load the design into eCADSTAR Schematic Editor.
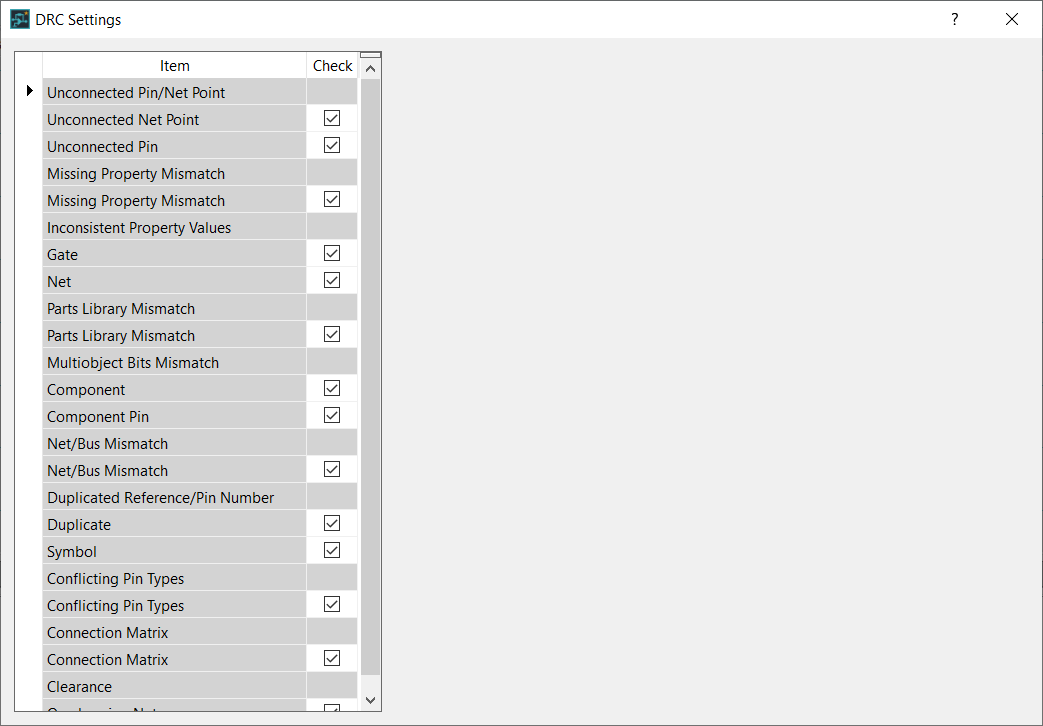
- On the Report tab, click the DRC split button and select DRC Settings. The DRC Settings dialog is displayed.
Note
The DRC Settings dialog should be reviewed to determine the checks that are required in the design.
The DRC Settings dialog should be reviewed to determine the checks that are required in the design.
- Update the DRC settings, as required, and close the dialog by clicking the X button in the title bar.
- Click DRC on the Report tab. The DRC dialog is displayed.
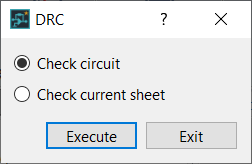
- Select the Check circuit radio button to check the entire design. Alternatively, select Check current sheet to only check the currently active sheet.
- Click Execute to launch the DRC command. When the DRC process completes, the Check Results dialog is automatically displayed. Details are displayed for any items that require reviewing.
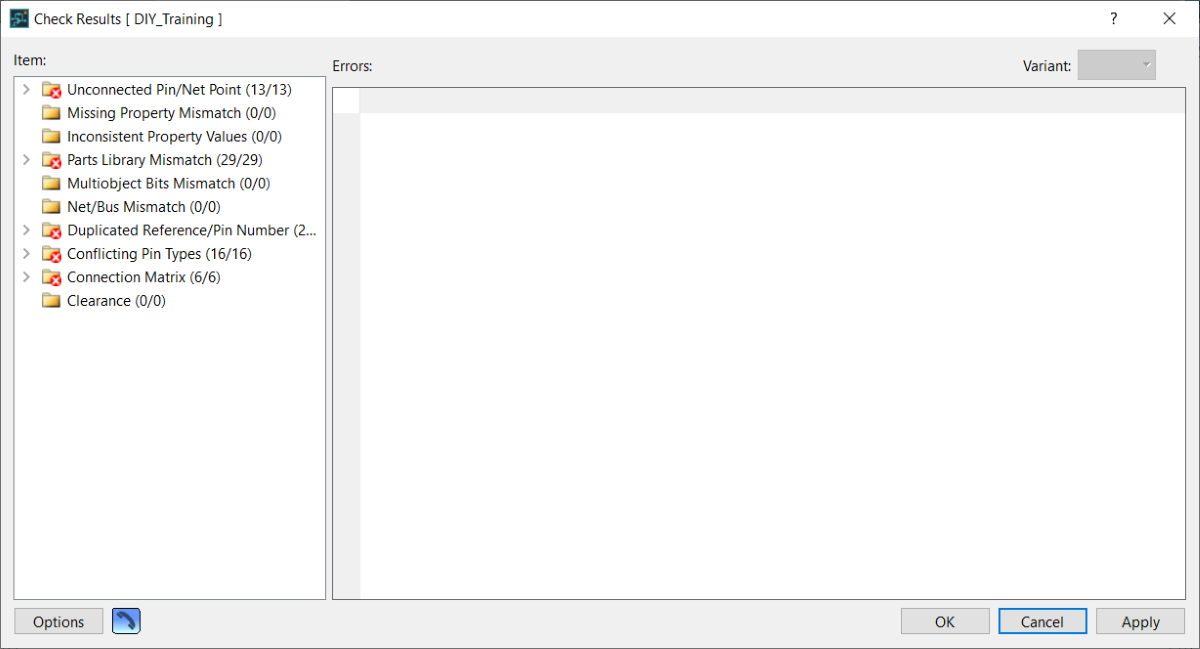
- Review the items in the Check Results dialog, and process them accordingly.
- Select File > Save to save any changes made to the design.
For PCB Editor
- Launch eCADSTAR PCB Editor.
- Select File > Open to launch the Open dialog.
- Browse to the location of the migrated design, and select the [design].pdes file.
- Click Open to load the design into eCADSTAR Schematic Editor.
- On the Report tab, select the DRC split button and select DRC Settings. The DRC Settings dialog is displayed.

Note
The DRC Settings dialog should be reviewed to determine the checks that are required in the design.
The DRC Settings dialog should be reviewed to determine the checks that are required in the design.
- Update the DRC Settings dialog as required, and close the dialog by clicking the X button in the title bar.
- On the Report tab, click DRC. The DRC command dialog is launched.
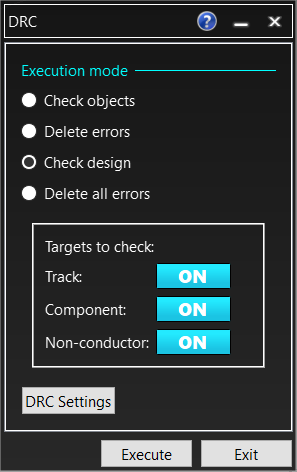
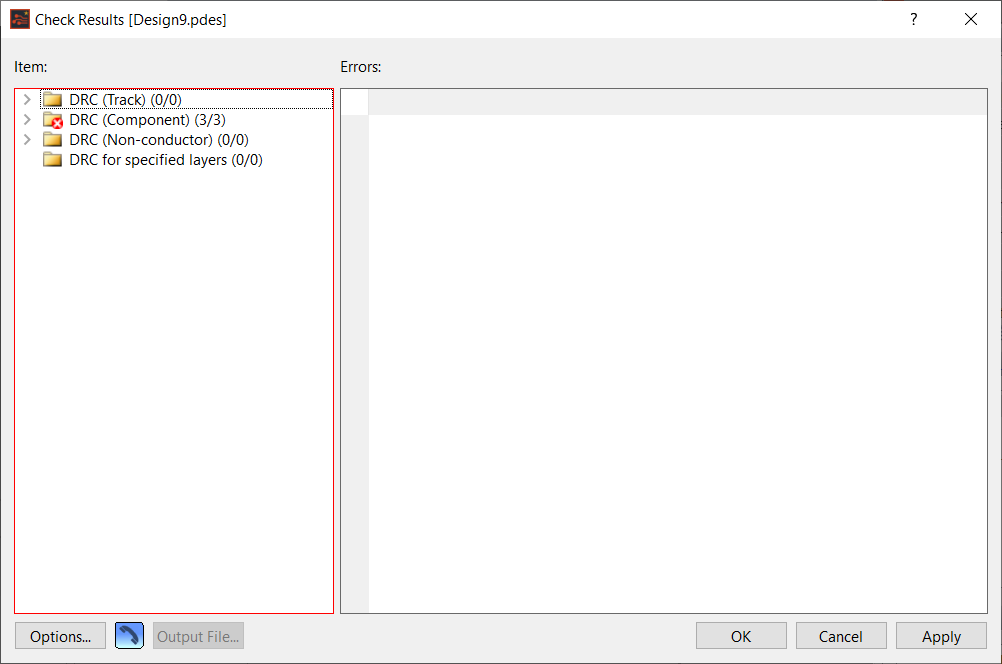
- Select Check design to check the entire design. Ensure that all required targets to check are selected, and click Execute to run the DRC command. When the DRC process completes, the Check Results dialog is automatically displayed. Details are displayed for any items that require reviewing.
Note
Selecting Check objects allows a an area of the design to be checked.
Selecting Check objects allows a an area of the design to be checked.
- Review the details of items within the Check Results dialog, and process them accordingly.
- Select File > Save to save any changes made to the design.
This completes the process of migrating CADSTAR design data to eCADSTAR. See: Appendix Appendix K: Additional Notes for information on migration issues.
Related Topics
Appendix A: File Types
Appendix B: Determining the Input Data
Appendix C: Cadstar Layer Sub Types
Appendix D: Global Signals
Appendix E: Mapping Recommendations
Appendix F: High Speed Migration
Appendix G: Migration of Padstacks
Appendix H: Post Processing a PCB Design that is Annotated using a RINF Netlist
Appendix J: Post Processing a Part with Common Pins
Appendix K: Additional Notes
