
Appendix H: Post Processing a PCB Design that is Annotated using a RINF Netlist
If a RINF netlist is used to create only a PCB design within CADSTAR. You must follow the procedures below after the design is migrated to eCADSTAR. This will allow you to make future engineering changes to the PCB design using the RINF netlist output from a third-party vendor.
You must already have a master migrated library, and a RINF netlist file which exactly matches the CADSTAR PCB design that is to be migrated to eCADSTAR.
- Follow the CADSTAR to eCADSTAR migration tool to set up the required items for the most suitable design migration for the PCB. Finish the migration to obtain the PDES design.
- When migration of the PCB design is complete, set the library path in the Product Settings dialog, Library section in eCADSTAR. Specify the design library that is created during the migration. Restart the application to enable this change for eCADSTAR PCB Editor.

- Open the migrated design library in eCADSTAR Library Editor. With the Parts tab selected, scroll the grid to locate the Use in Schematic system attribute.
The migration process sets this value to No for all parts.
- Select the column header for Use in Schematic. This selects this cell for all parts.
- For a cell within this column, click the drop down arrow to list the available values. Select Yes to update all cells to Yes.
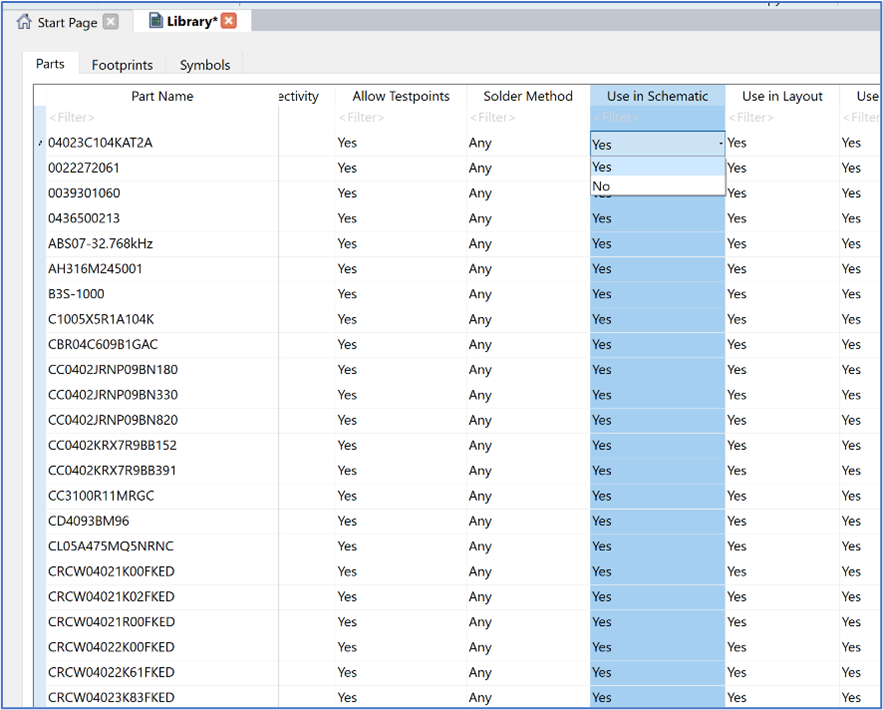
Only change this value for items that are referenced in the RINF netlist. Any parts which are considered “PCB only”, such as fiducials, are removed from the design during forward annotation if not present in the RINF netlist.
- Save the design library in eCADSTAR Library Editor, and close the application.
- Open the migrated design in eCADSTAR PCB Editor.
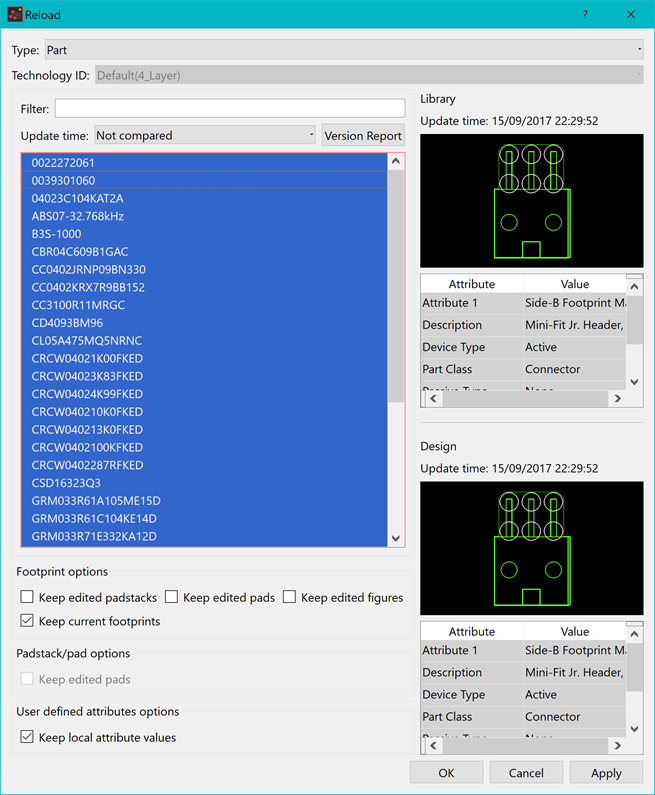
- In the Component tab on the ribbon, open the Reload Library dialog.
- Set the Type option to Part, and then click an item in the list of parts. Press CTRL+A on the keyboard to select all items.
- Select Apply or OK to reload the updated parts from the modified migrated design library.
- Save the design.
- In the Product Settings dialog, Library section in eCADSTAR, set the library path to the master library that has been created. Restart the application to enable this change for eCADSTAR PCB Editor.

- Open the migrated design in eCADSTAR PCB Editor.
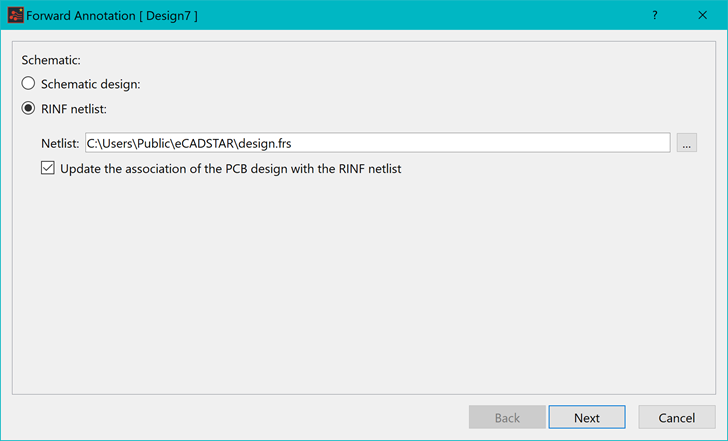
- In the Design tab on the ribbon, launch the Forward Annotation dialog.
- In the dialog, specify that forward annotation is performed using the RINF file that matches the design.
- Save the design.
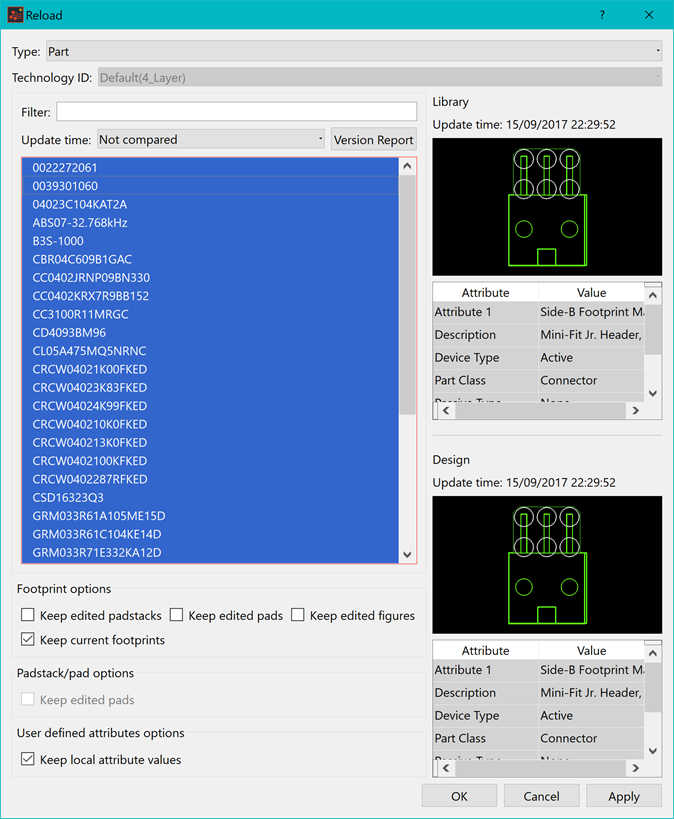
- In the Component tab on the ribbon, open the Reload Library dialog.
- Set the Type option to Part, and then click an item in the list of parts. Press CTRL+A on the keyboard to select all items.
- Select Apply or OK to reload the updated parts from the master design library.
- Save the design.
Appendix A: File Types
Appendix B: Determining the Input Data
Appendix C: Cadstar Layer Sub Types
Appendix D: Global Signals
Appendix E: Mapping Recommendations
Appendix F: High Speed Migration
Appendix G: Migration of Padstacks
Appendix J: Post Processing a Part with Common Pins
Appendix K: Additional Notes
