
Signal Attributes
This section describes how to check and set the signal attributes related to EMI analysis.
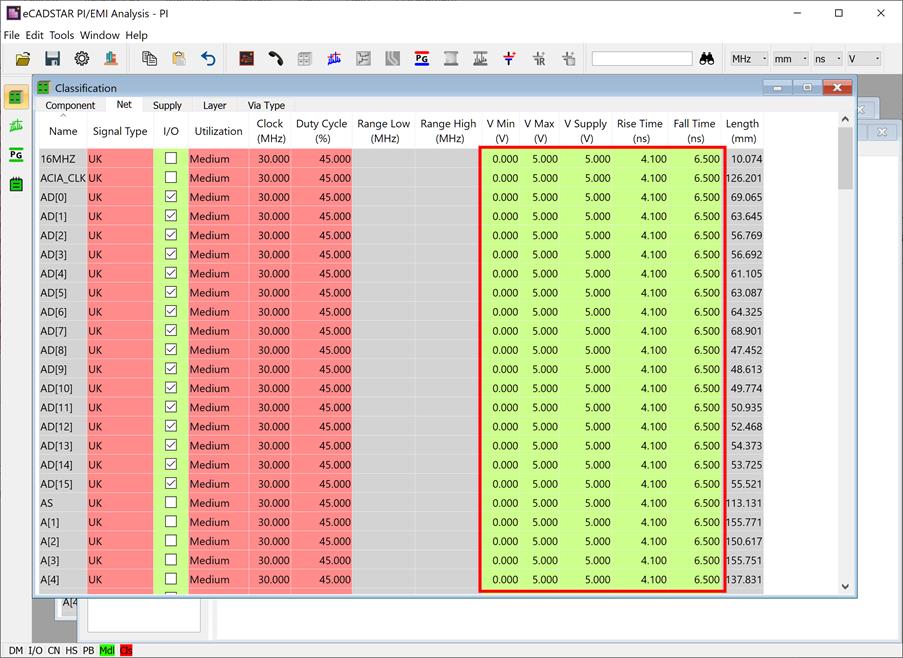
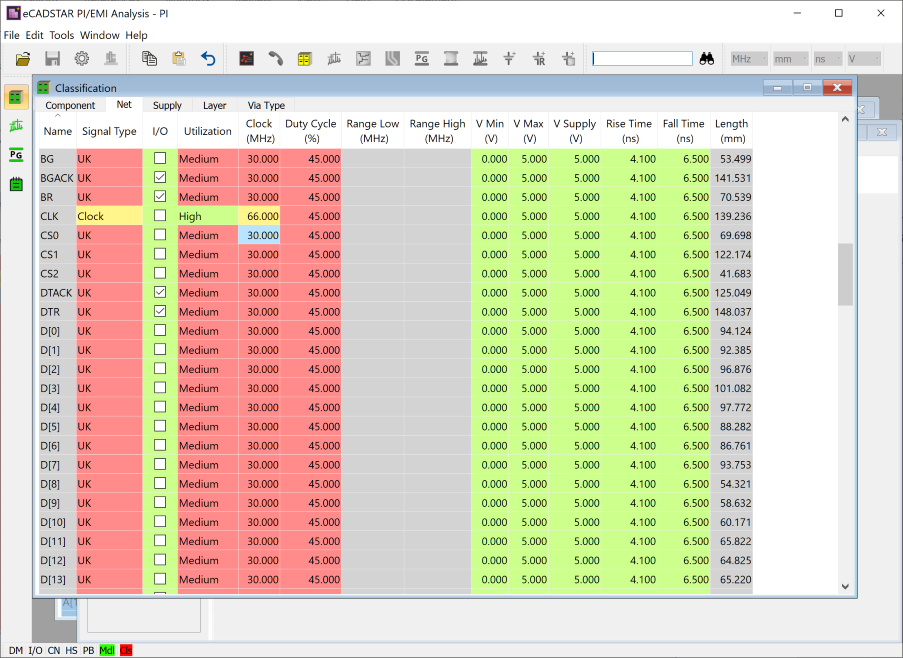
- In the Classification view, select to the Net tab.
- Check the V Min, V Max, V Supply, Rise Time and Fall Time values. These values represent the driver characteristics (switching characteristics) in a signal, and are the source in the analysis.
Note
If a simulation model is assigned, then these attributes are automatically set, based on the model information. If two or more drivers are found, then the worst case is adopted.
If a simulation model is assigned, then these attributes are automatically set, based on the model information. If two or more drivers are found, then the worst case is adopted.
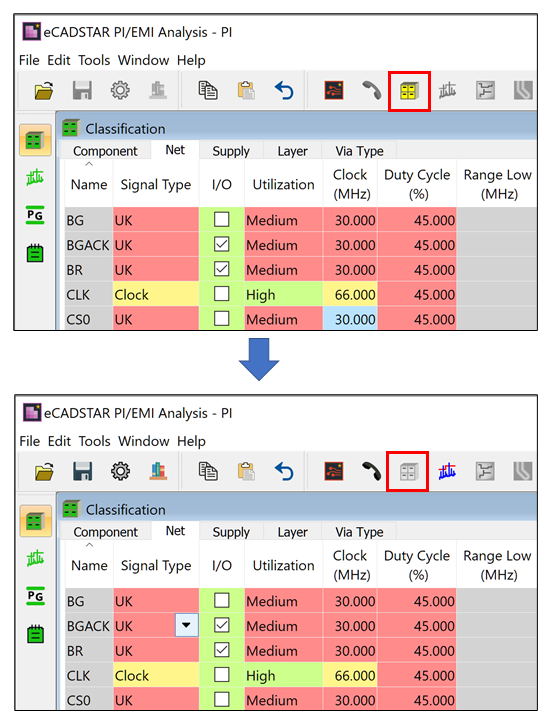
- Configure the signal settings as follows.
- For "CLK", first set Signal Type to Clock.
- Next, enter "66" in the Clock (MHz) column.
- Utilization is automatically set to High.
Based on these settings, "CLK" is handled as the clock signal.
Note
- One of the following signal types must be assigned to each signal according to its feature: Control, Data, Bus, Clock, Analog, Power or Ground. Signal types other than Power or Ground are not delivered from eCADSTAR, and must be set using the PI/EMI analysis module. When a signal type is unknown or is not covered by the above signal types, then it is classified as UK.
- Utilization represents the gradient at which a signal operates. One of the following levels are assigned to a signal according its feature.
- High: the signal is handled as an emitter in EMI analysis. This indicates that the signal operates at the same gradient as the clock frequency that is set.
- Medium: the signal is handled as an emitter in EMI analysis. This indicates that the signal operates at half the gradient of the clock frequency that is set.
- Low: the
signal is handled as a non-emitter in EMI analysis. This level indicates
that the signal usually does not operate, and is therefore considered
only for the calculation of crosstalk noise received from adjacent
signals.
- If an attribute such as signal type is changed,
then some functions are restricted to maintain consistency. When this
occurs, the data must be re-classified. Do this by executing the
 Classify
command, which is made available.
Classify
command, which is made available. - Click Classify to process the modified data.
- After execution, the Classify button is made unavailable.
This task is demonstrated in the following video.
