
Recognizing and Changing the Component Type
Each component in design data must be recognized as a proper component type (passive component, IC part, or connector). In this topic you will set the component reference designator in order to determine the type of the connector.
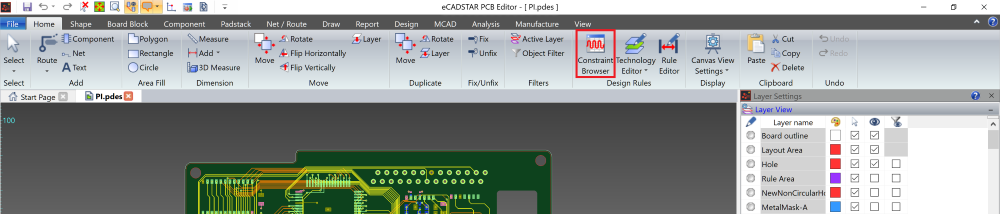
- On the ribbon, click Home > Design Rules > Constraint Browser. The Constraint Browser is displayed
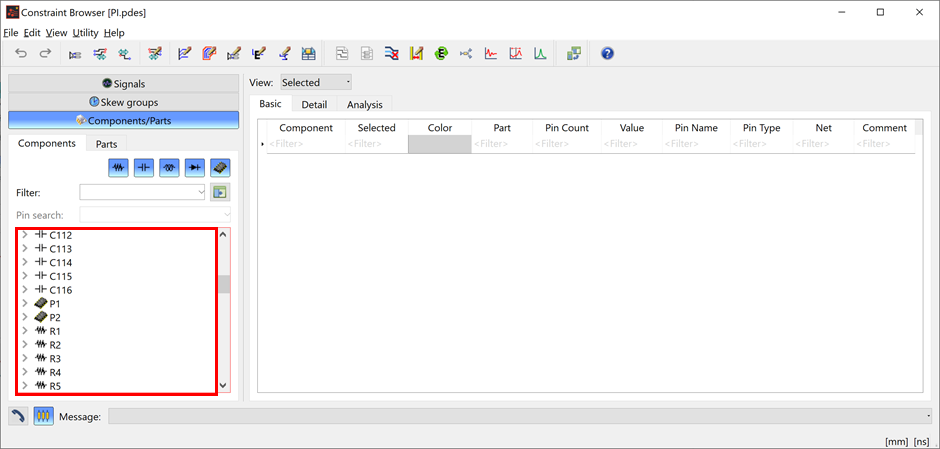
- Click the Components/Parts
button to check the content of the tree in the Components
tab. In this design data, "P" is used as the reference header
of a connector. However, an icon for
 Other
Components (Other) is shown for components with reference header "P",
and the components are not recognized as connectors.
Other
Components (Other) is shown for components with reference header "P",
and the components are not recognized as connectors.
If a proper component type is recognized for each component in the design data, then the display icons for components in the tree are as shown below.
| Value | Description |
|---|---|
| Resistor |

|
| Inductor |

|
| Capacitor |

|
| Diode |

|
| IC |

|
| Connector |

|
| Others |

|
Changing the Component Type
Change the Component Type as follows.
- On the Start menu in Windows, click eCADSTAR > eCADSTAR [Version] > Library Editor [Version]. eCADSTAR Library Editor starts.
- In the File tab, click Open Library. Alternatively, click Open on the Home tab. The Select Folder dialog is displayed.
- Browse to the following library location and click Select Folder: “C:\Users\Public\eCADSTAR\eCADSTAR [Version]\Analysis\Library”.
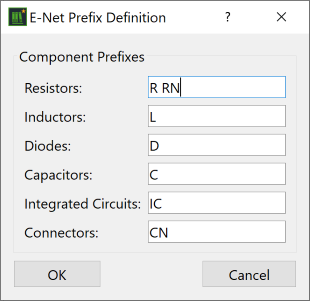
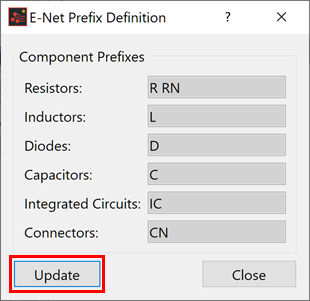
- On the ribbon, click Home > Editors > E-Net Definition. The E-Net Prefix Definition dialog is displayed.
If the DIY training has been completed for eCADSTAR Signal Integrity, then the E-Net Prefix values may differ for Integrated Circuits.
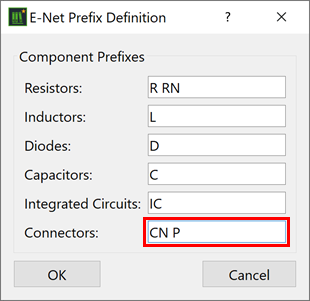
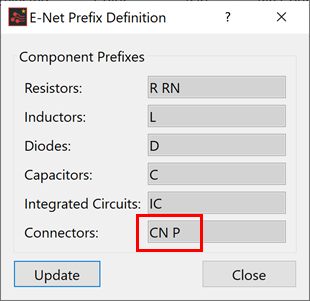
- Add "P" to the text in the Connectors box in the Component Prefixes section. To define a combination of multiple component headers, as shown in the image below, specify multiple character strings by delimiting them using the "space" character.
- Click OK, and exit eCADSTAR Library Editor.
- In eCADSTAR PCB Editor, click Home > Design Rules > Constraint Browser on the ribbon. Constraint Browser is launched.
- On the Constraint Browser menu bar, click Utility > E-Net Prefix Definition. The E-Net Prefix Definition dialog is displayed.
- Click Update in the E-Net Prefix Definition dialog.
- Close the displayed message by clicking Yes. Note that “P” has been appended to “CN” in the Connectors box, in the E-Net Prefix Definition dialog.
- Close the E-Net Prefix Definition dialog.
- In Constraint Browser, select Utility
> Reconstruct E-Net
 on
the menu bar to update the component categorization in the Constraint
Browser tree.
on
the menu bar to update the component categorization in the Constraint
Browser tree. - Click Yes in the message box to proceed.
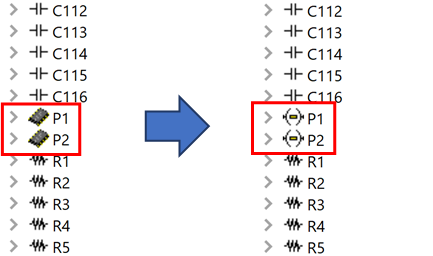
- Check the contents of the tree in the Components
tab. Notice that the icon for each component with a Reference Designator
starting with “P” has changed to the
 Connector
icon.
Connector
icon.
This task is demonstrated in the following video.
