
Task 27: Applying Changes to the Strategy
In this task, you will apply changes to the strategy in order to completely route the design.
- Load the design Routed_1.pdes. This design should be the same as the result obtained from the previous task.
- Notice that this design is not completely routed. For example, there is still a connection under IC4.
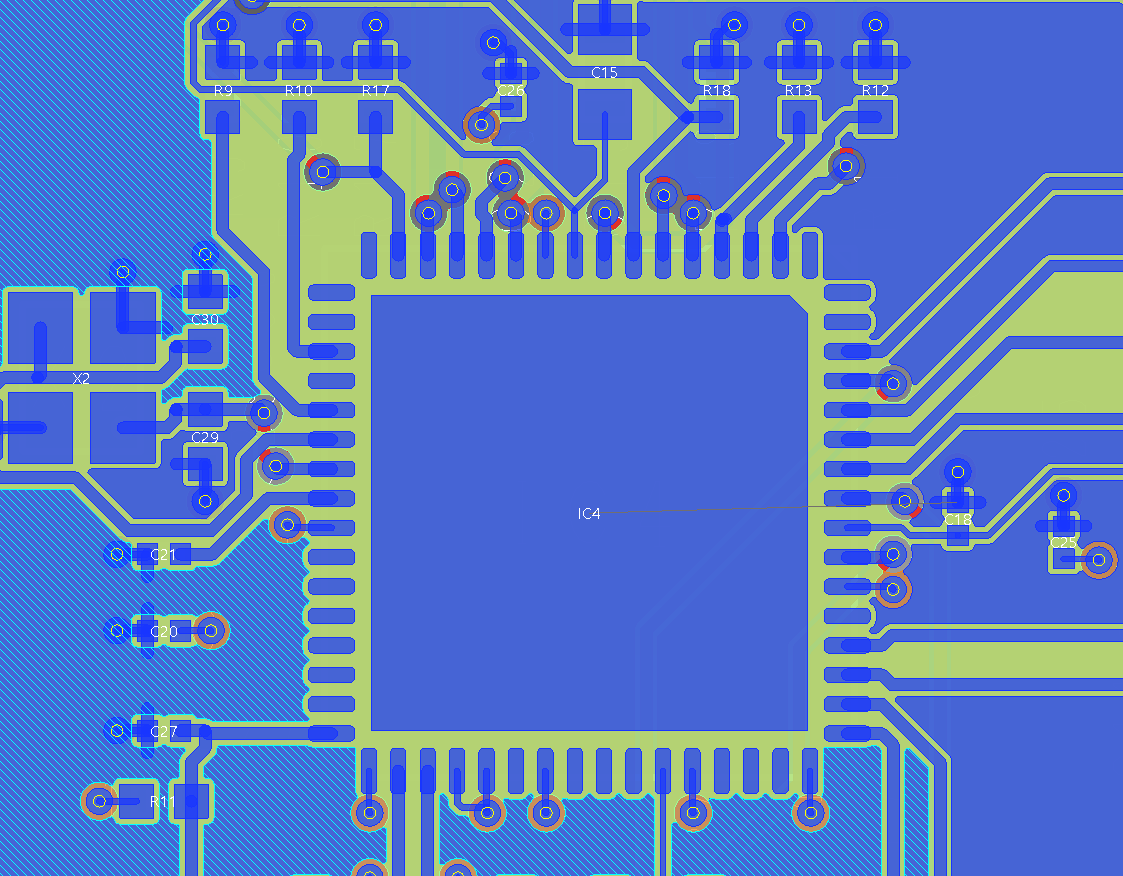
Figure 1: Remaining connection under IC4
- On the canvas, select the routing area routing_area1.
- Select Net / Route > Autorouting > Autorouter on the eCADSTAR PCB Editor ribbon. The Routing Strategy dialog is displayed.
- Load the strategy Unroute.rcc, or Mystrategy.rcc if you have generated this previously.
- In the Routing Strategy, click Save As.
- In the displayed Save Strategy
File dialog, click the
 button twice and
save the file as "routing_area1.rcc" in the following location:
"\routed_1\routing_area1". This removes the need to load
this strategy each time the autorouter is launched. If you are using
a different routing area, then use that name. The next time that the
autorouter is launched, this strategy is opened automatically.
button twice and
save the file as "routing_area1.rcc" in the following location:
"\routed_1\routing_area1". This removes the need to load
this strategy each time the autorouter is launched. If you are using
a different routing area, then use that name. The next time that the
autorouter is launched, this strategy is opened automatically. - In the Routing Strategy dialog, deselect the Use column for rows 3 and 4, as shown below.
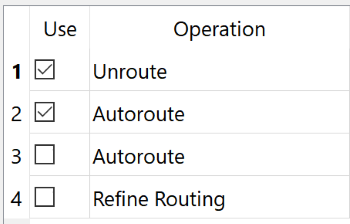
Figure 2: Deactivating Tasks
- In the Routing Strategy dialog, click Start to start the strategy.
- In the Routing Strategy Progress dialog, the following information is displayed near the end of the report.
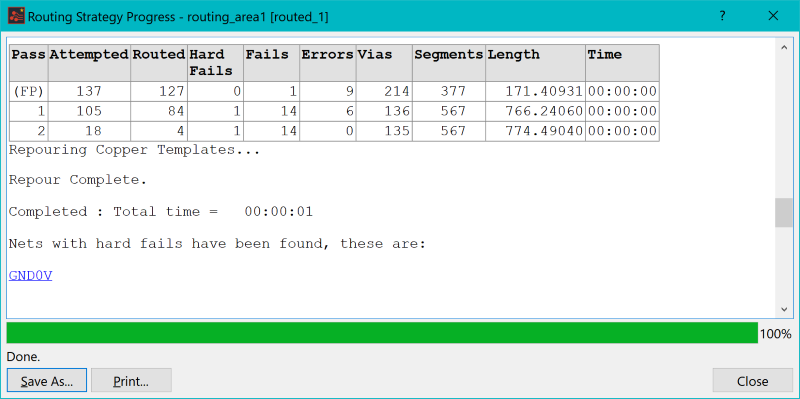
Figure 3: Hard Fail Notification
- You will see that a hard fail for signal GND0V is being reported.
- A hard fail is when the autorouter is unable to complete the routing for a particular net for a reason that it cannot solve itself. For example, the track widths and spacings may be too large, or exits may be blocked by copper.
- In this case, the hard fail exists because the autorouter settings do not allow vias under pads. You will correct this in the following steps.
- Close the Routing Strategy Progress dialog.
- To fix the reported hard fail, double-click in the Settings column for row 2 (Autoroute Power Nets).
- In the Routing Setup dialog, select the Autorouting tab
- In the Vias Under Single Layer Pads field, select Allow Breakout and click OK.
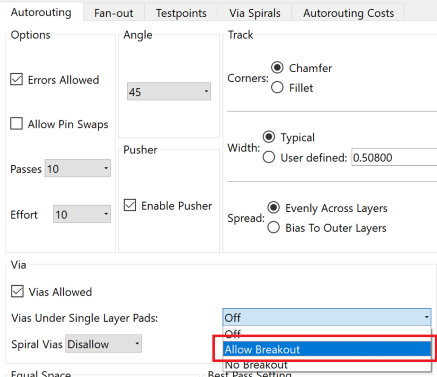
Figure 4: Vias Under Single Layer Pads
- Re-run the strategy by clicking Start in the Routing Strategy dialog. You will see that the hard fail is not displayed..
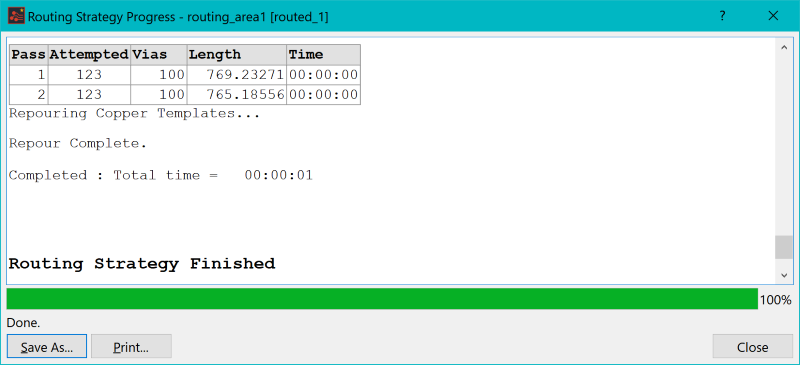
Figure 5: No Hard Fails Displayed
-
Save the strategy, and accept the routing results. You will see that a via has been added under the GND pad on IC4.
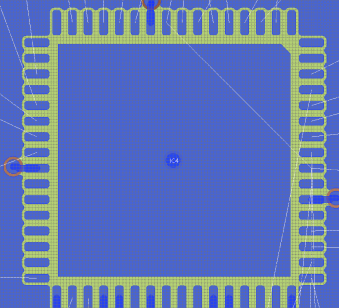
Figure 6: Via Under Pad
- Select routing_area1 again, and launch the autorouter.
- Re-enable all tasks, and start the strategy. This will completely autoroute the design.
- You may still get hard fails reported for the Refine Routing task, but these just mean that the routing could not be improved, when compared with the previous tasks.
- If the Autoroute tasks report no hard fails or fails, then the design is successfully routed.
This procedure is demonstrated in the following video.
