
Task 8 (Optional): Specifying a User-defined Attribute
This optional topic describes how to assign the user-defined attribute that is created in Task 10 (Optional): Adding User-defined Attributes to a component in eCADSTAR Schematic Editor. The above optional task must be completed before following this task.
- Open the DIY training design from the following location: C:\Users\Public\eCADSTAR\eCADSTAR [version]\Designs\DIY_Training\SCH\DIY_Training\DIY_Training.sdes.
- In eCADSTAR Schematic Editor,
click Component > Library >
 Reload. The Reload dialog is displayed.
 - In the Reload dialog, select all parts and deselect the Keep local attribute values check box.
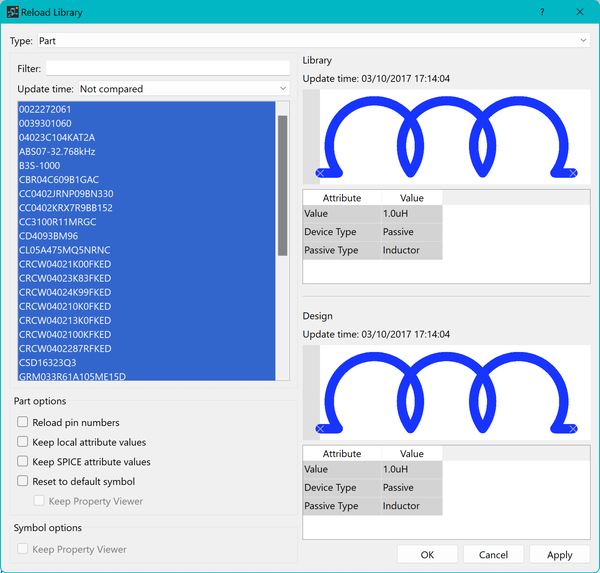
Figure 1: The Reload dialog
- Click OK in the Reload dialog, and accept any warnings. All parts in the design are reloaded.
- On the sheet in eCADSTAR Schematic Editor, select the component "IC6 (CD4093BM96)" and locate the attribute My_DIY_Attribute in the Properties panel.
Select all gates on the component.
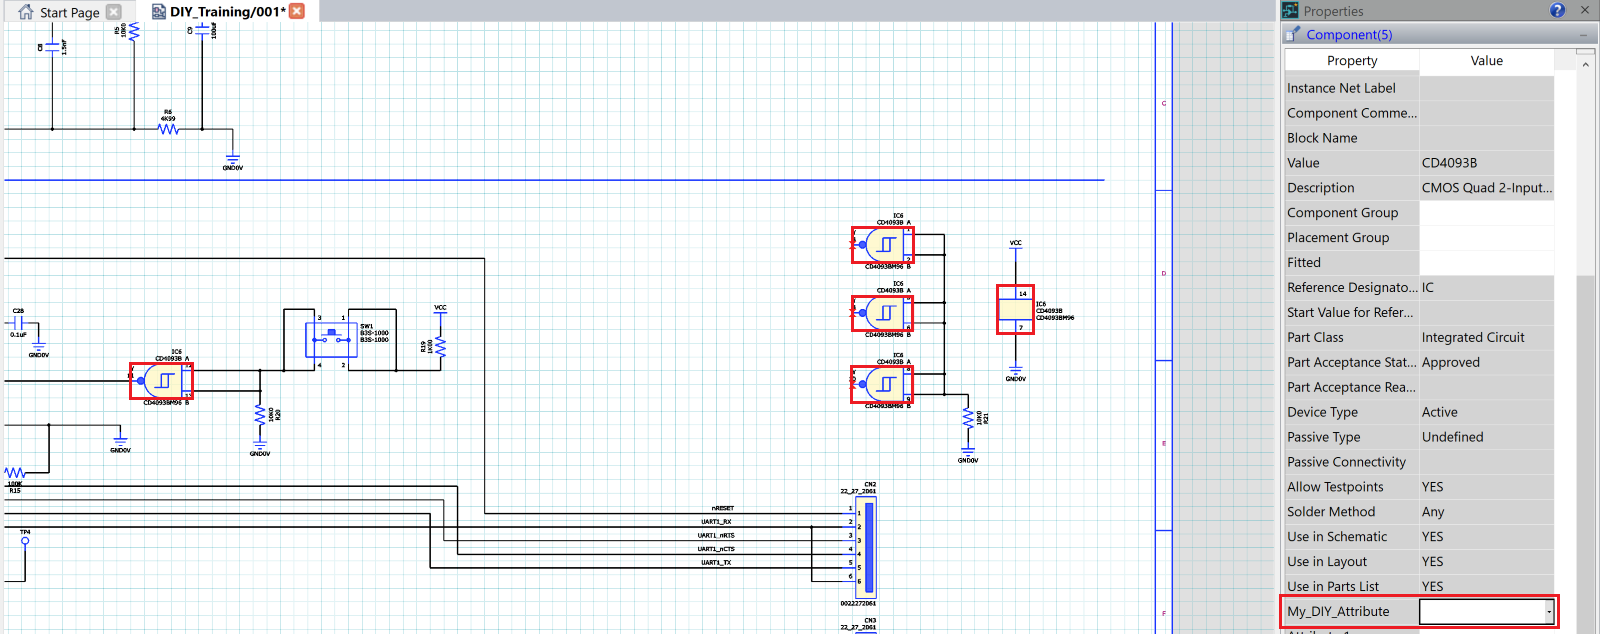
Figure 2: User attributes for selected items
- In the My_DIY_Attribute row, Value column, select either Attribute_1, Attribute_2 or Attribute_3.
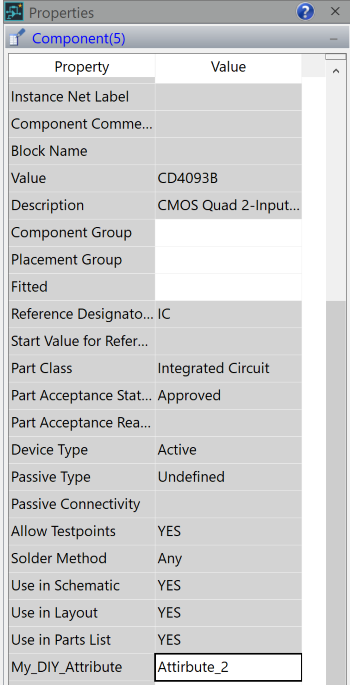
Figure 3: Properties panel with populated user attribute
- Deselect the components in the sheet by clicking on any blank space in the canvas.
- Click [File > Save] to save the settings and then click [File > Close] to close the design page.
- Click [File > Save Design As] to save the design with a different name and in a different location.
- In the Save Design dialog, input the Design Name as "My_Attribute_DIY_Training".
- Click [...] to browse for the Design Location as: C:\Users\Public\eCADSTAR\eCADSTAR [version]\Designs\DIY_Training\SCH”.
This attribute is transferred into eCADSTAR PCB Editor when a new PCB design is created from this Schematic.
This task is demonstrated in the following video.
