
Task 10 (Optional): Adding User-defined Attributes
In this optional task, you will add a user-defined attribute using the Attribute Manager dialog, and assign values to it.
- In eCADSTAR Library Editor,
click Home > Editors >
 Attribute Manager
on the ribbon. The Attribute Manager
dialog is displayed.
Attribute Manager
on the ribbon. The Attribute Manager
dialog is displayed. - In the Attribute Manager
dialog, click Add Attribute and type
“My_DIY_Attribute” in the Label column.
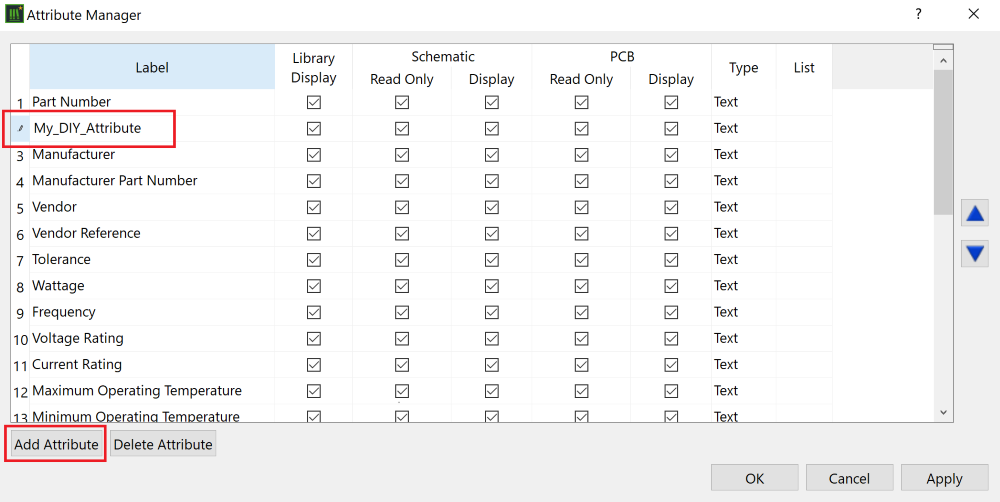
- Select the columns for the attribute My_DIY_Attribute
as shown below. These settings ensure that it is editable in eCADSTAR Schematic Editor,
and read-only in eCADSTAR PCB Editor.

- Point the cursor in the List
column, and click the displayed
 button. The Edit List dialog is displayed.
This allows you to specify a list of attribute values that can be
selected.
button. The Edit List dialog is displayed.
This allows you to specify a list of attribute values that can be
selected.
- In the Edit List dialog, click Add value and create attribute values "Attribute_1", "Attribute_2" and "Attribute_3". These values will be available from a drop-down list for the attribute My_DIY_Attribute.
- Close the Edit List dialog and Attribute Manager dialog by clicking OK.
- Save the Library and close eCADSTAR Library Editor.
This procedure is demonstrated in the following video.
