The Routing Strategy Dialog
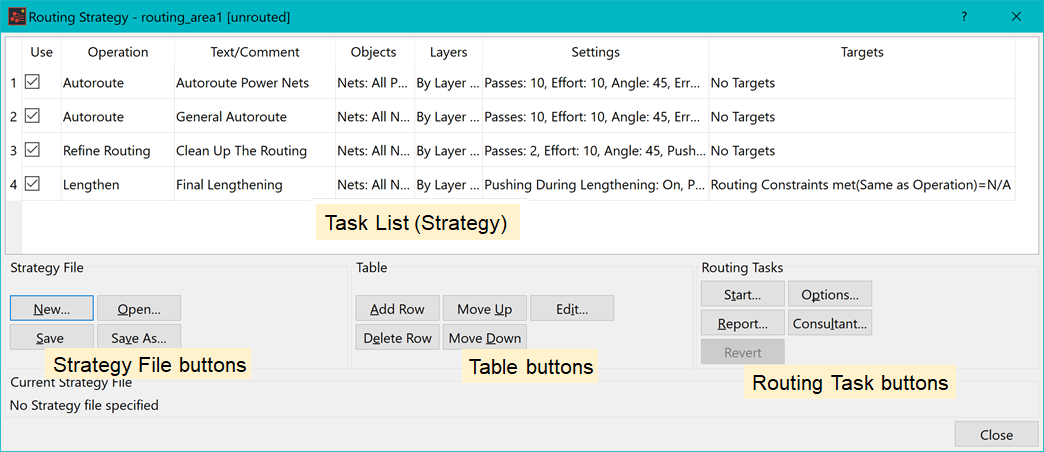
In this section you will familiarize yourself with the Routing Strategy dialog. For a more detailed description of tasks and the configuration of the autorouter, see the "Autorouter Tasks" section of the Autorouter training. The Routing Strategy dialog is shown below. It shows the tasks that are executed in sequence to autoroute the design. The list of tasks is called the routing strategy. The different areas in this dialog are described below.

Figure 1: The Routing Strategy dialog
The name of the relevant routing area is shown in the title bar of the Routing Strategy dialog, and on the title bar of any sub-dialogs.
General Operations
When you first launch the autorouter, a default set of tasks is generated. The tasks that are generated are dependent on the contents of the design. For the Unrouted.pdes design, the following tasks are generated.
- Autoroute power nets
- Autoroute whole design
- Refine routing
These tasks effectively shorten the routed length, attempt to minimize vias, and clean up the previously-generated autorouting. Details on the types of operations are provided in the "Autorouter Tasks" section of the Autorouter training.
If you have access to a PCB High Speed license feature, then the following additional task is included in the default set.
- Lengthen
Strategy File

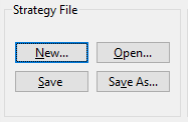
Figure 2: Strategy File Buttons
The Strategy File buttons are described below.
- New: creates a blank strategy with no tasks in it. If the current strategy has been changed since you last saved it, then a warning dialog is displayed that prompts you to save it.
- Open: opens a previously-saved strategy. You are prompted for a file name. If the current strategy has been changed since you last saved it, then a warning dialog is displayed that prompts you to save it.
- Save As: saves the current strategy to a new file. You are prompted for a file name.
- Save: saves a previously-saved strategy without prompting for a file name. This only works if this section of the window is showing a file name, as shown below. If a file name is not shown, then the Save button works in the same way as Save As.

Figure 3: Name of the current strategy file
Table

Figure 4: Table Buttons
The Table buttons are described below.
- Add Row: adds a default task before the currently-selected task in the table. If no task is selected, then a default task is added at the end of the strategy.
- Delete Row: removes any of the currently-selected tasks.
- Move Up: moves any of the currently-selected tasks up the list, even if multiple tasks are selected.
- Move Down: move any of the currently-selected tasks down the list, even if multiple tasks are selected.
- Edit: edits the currently-focussed cell. Alternatively, double-click the cell or click "..." in the cell (see section "Autorouter Tasks").
Routing Tasks

Figure 5: Routing Tasks Buttons
The Routing Tasks buttons are described below.
- Start: executes the currently-displayed set of tasks.
- Options: allows you to set different options for executing the strategy.
- Report: shows the report from the last time the strategy was executed (if available).
- Consultant: launches the Consultant dialog. This dialog allows you to identify areas of the design that will cause the autorouter problems (see section "The Routing Consultant").
- Revert: if the Consultant dialog has been used to generate a strategy, then this button reverts the strategy file tasks to those that were listed before the consultant was launched.

