
Task 5: Placing Components
In this task, you will place the components vertically around the board so that they are ready for placement.
- Continue to use your design from the last task, or open Design3.pdes.
- Click the Arrange Components icon on the Component tab. Ensure that the Selected components radio button is selected.
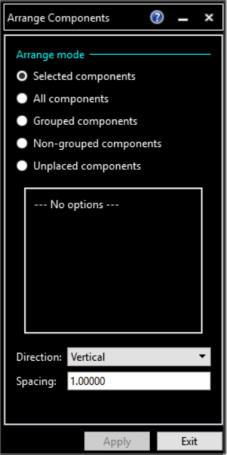
Figure 1: The Arrange Components Dialog
- Set the Direction to Vertical and the Spacing to "1.00000".
- Select the components arranged outside the board by framing an area around them. Use Shift+Click when framing the components. This can be done by dragging the cursor from the top-left corner of the grouped components to the bottom-right. This will frame the area.
Note
An appropriate layer must be selected (Conductor-1).
An appropriate layer must be selected (Conductor-1).
- Specify two points of a rectangle to the right of the board outline on the canvas. When the second point is entered, the arrangement processing starts and all components are rearranged to the right of the board outline. This is illustrated below.

Figure 2: Re-arranging Components
Note
The exact position of the components depends on the specified position of the rectangle.
The exact position of the components depends on the specified position of the rectangle.
-
On the quick access toolbar click View All.
This task is demonstrated in the following video.
You have now arranged the components ready for placement. You will place the components on the board in the next task.
