
Post Routing Processes
When you have finished routing, you may want to reinforce, chamfer or fillet sections of the design. The following sections describe how to do this:
Chamfer
Using the Chamfer command, it is possible to chamfer the corners of a track.
Overview
- Click the route location that you want to chamfer.
- On the eCADSTAR PCB Editor ribbon, select Shape > Reshape > Chamfer.
- Set the parameters within the Chamfer command dialog, as required.
- Click Apply. The corner is now chamfered.
Fillet
The Fillet command allows the corners of a track to be filleted.
Overview
- Click the route location that you want to fillet.
- On the eCADSTAR PCB Editor ribbon, select Shape > Reshape > Fillet.
- Set the parameters within the Fillet command dialog, as required.
- Click Apply. The corner is now filleted.
Reinforce
The Reinforce command can be used to create reinforcing figures for a pattern (area fills and lines). The illustration below shows line reinforcement.
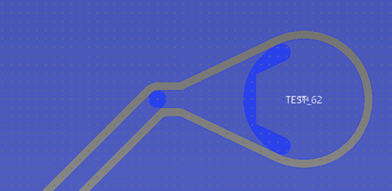
Figure 1: A Reinforced Pad
Overview
- On the eCADSTAR PCB Editor ribbon, select Net/Route > Routing > Reinforce.
- Set the parameters within the Reinforce dialog, as required.
- On the canvas, click the location that you wish to reinforce. The track is now reinforced.
Task 15: Reinforcing a Track
Over the next two tasks, you will perform different post routing processes. In this task, you will learn how to reinforce a track as it meets a pad.
- Continue to use your routed design or load Design6.pdes.
- On the eCADSTAR PCB Editor ribbon, select Net/Route > Routing > Reinforce.
- In the Reinforce Dialog, Teardrops field, click Settings to launch the Design Settings dialog.
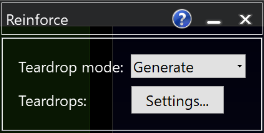
Figure 2: The Reinforce Dialog
- In the Design Settings dialog, set the parameters shown below and click Apply.
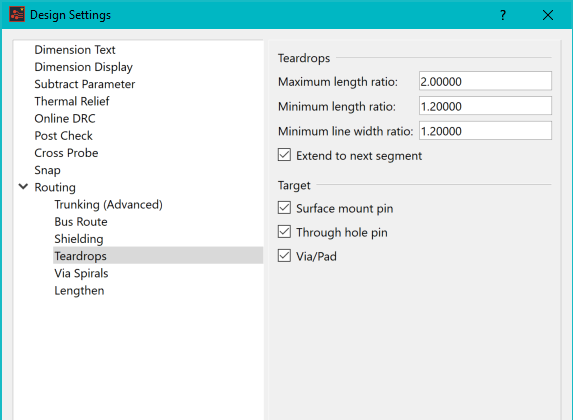
Figure 3: Design Settings - Teardrops
- In the Reinforce dialog, set the Teardrop mode to Generate.
- Click the location that you want to reinforce. This is the track HOSTINTR shown below.
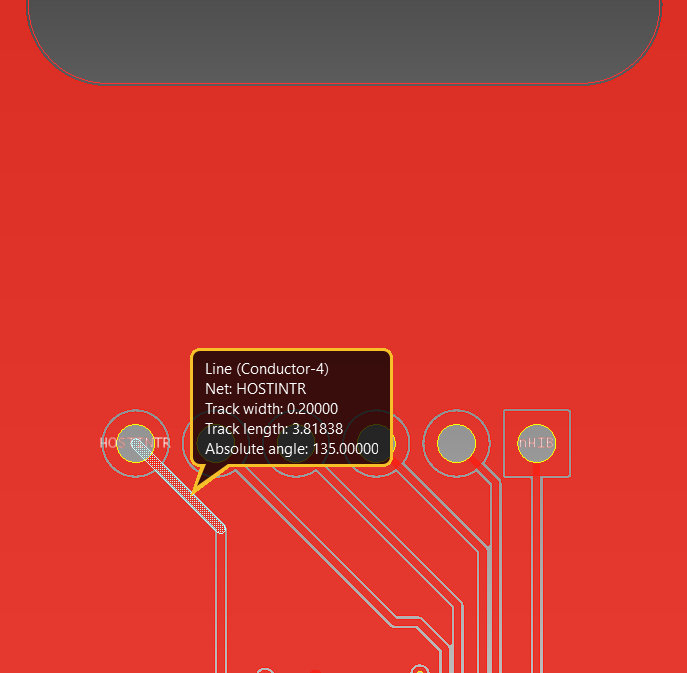
Figure 4: Selecting a Net to Reinforce
The track is now reinforced as shown below.

Figure 5: A Reinforced Track
- Experiment by selecting the group of pins on connector CN3, above, to reinforce the pins simultaneously. Note that reinforced tracks can be removed by selecting the Delete option in the Teardrop mode box.
This task is demonstrated in the following video.
You have now reinforced a track. You will create fillets in the next task.
