
Task 9: Generating Fan-outs
In the PCB Routing section, you will learn that eCADSTAR includes a wide selection of manual, automatic and semi-automatic routing tools to assist in the design of the PCB. Some of these tools are covered in the topics in this section. eCADSTAR provides the functionality to fan-out surface mount pads to vias. This feature is often used when dense routing is required; for example, BGAs.
In the exercise below, you will use the existing design that you placed in the previous exercise to generate fan-outs for IC4. If you did not complete placing the design, you can open design design4.pdes to demonstrate the process of creating fan-outs.
- Use your placed design, or start from the placed design Design4.pdes.
- Zoom in to IC4.
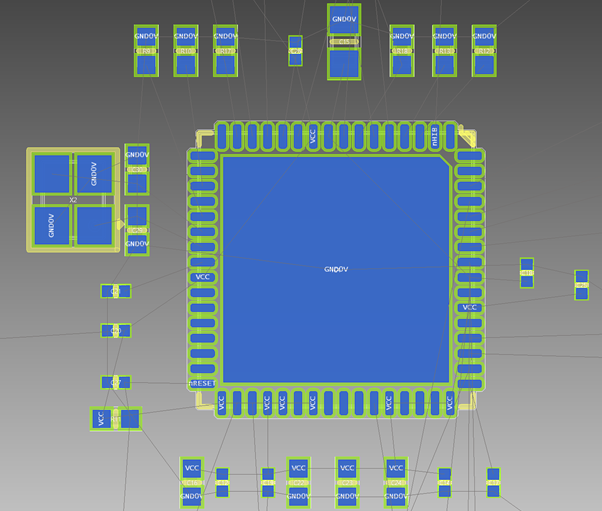
Figure 1: Zoom Area showing IC4
- In the Layer Settings
panel, set visibility of all layer to off, then select and set on
the
 Visible layer check box for Board
outline, Layout Area, Hole and each conductor layer.
Visible layer check box for Board
outline, Layout Area, Hole and each conductor layer.
Conductor layers must be displayed in order for the Fan-out command to run successfully.
- Select the Fan-out command on the Padstack tab.
- Set the command dialog as shown below.
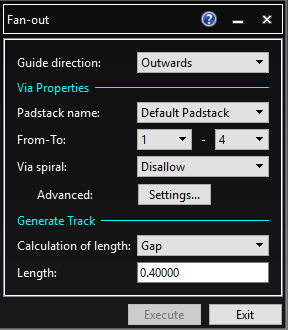
Figure 2: The Fan-out Dialog
- Press and hold the Ctrl key, and click on pins 12 and 14 (These are the 2 shown below with the shorter track connected). Note that pin numbers and signal names can be displayed within the Canvas View Settings.
- Click Execute, and close the Fan-out report.
- Change the Length to 0.8.
- Press and hold the Ctrl key and click on pins 11 and 13. These are the two pins shown below with the longer track connected.
- Click Execute, and close the Fan-out report. The resulting fan-outs are shown below.
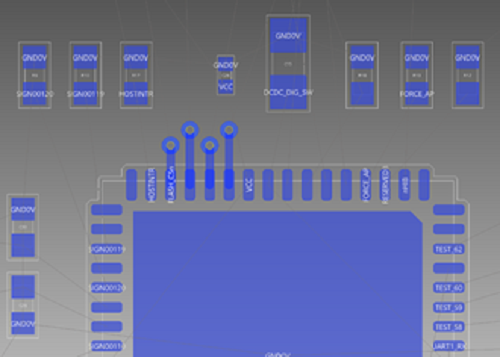
Figure 3: Fan-outs
- Repeat this task for pins 6 and 8 and 5 and 7, respectively. Also experiment with the values for both length and start angle. A layout is shown below; try to replicate this.
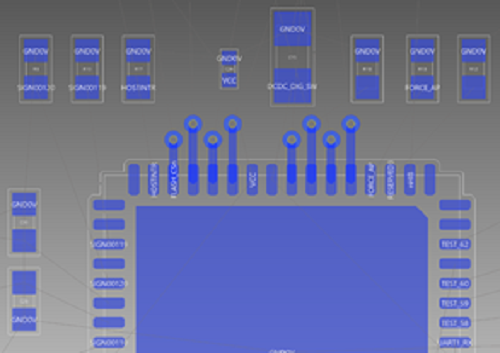
Figure 4: Additional Fan-outs
This task is demonstrated in the following video.
You have now learnt how to add fan-outs to your design. Next, you will look at the Add Route dialog.
