
Introduction to the Autorouter
The eCADSTAR Autorouter training guide describes the basic operations of the autorouter in eCADSTAR PCB Editor. You will perform a simple autoroute, and will also customize the autorouter process to perform more advanced tasks. You can follow this training guide on its own, or as part of the suite of eCADSTAR training guides. A knowledge is required of the fundamental principles of designing Printed Circuit Boards.
Disclaimer
The Autorouter command uses a series of complex algorithms, and will attempt to apply routing to a design using many factors and constraints during operation. This means there are numerous combinations of routing pattern which could be created. Therefore, it is not possible to confirm a repeatable operation using the command with this training material.
This guide is intended to only aid in the operation of the eCADSTAR Autorouter command, and does not represent a guide to aid in the correct development of a routing strategy to complete your design to a satisfactory routing result.
A license for the eCADSTAR autorouter is required to run this training. Check this as follows:
- On the eCADSTAR PCB Editor ribbon, click File > Configuration > Product Settings. The Product Settings dialog is displayed.
- In the Product Settings
dialog, select License Settings. The
license for the eCADSTAR autorouter is displayed in the Requestable
features box. This is illustrated below.
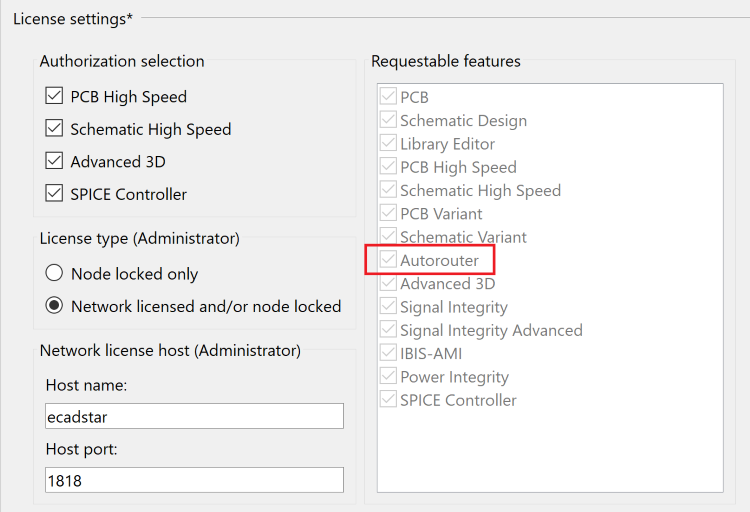
Figure 1: Autorouter License Check
Training Files
The following training files are provided.
PCB Files
- Unrouted.pdes: design placed, but with no routing.
- Routed_1.pdes: first attempt at autorouting.
Router Control Files
- Unroute.rcc: control file with the Unroute operation at the start.
Launching the Autorouter
In eCADSTAR, the autorouter works using routing areas. Routing areas can encompass the whole design or just sections of it.
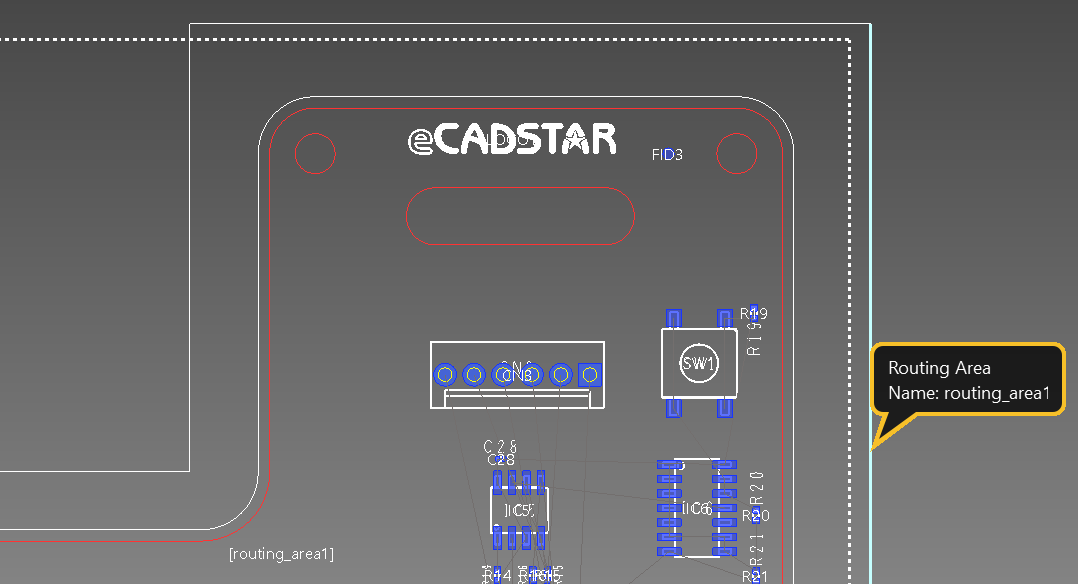
Figure 2: Routing Areas
You can create a routing area by clicking Net/Route > Autorouting > Add Routing Area on the eCADSTAR PCB Editor ribbon.

Figure 3: Adding a Routing Area
The following types of routing area can be added:
- Polygon: allows a free form routing area shape to be drawn.
- Rectangle: a simple rectangular routing area.
- Selection: a routing area can be created from an existing shape.
Launch the autorouter as follows:
- Select the routing area “routing_area1”
- Click Net/Route > Autorouting > Autorouter on the eCADSTAR PCB Editor ribbon. This will launch the main autorouter window. Alternatively, select the routing area, and then right-click and select Autorouter on the assist menu.
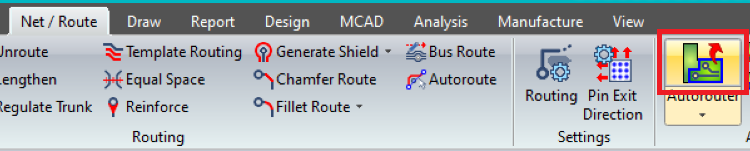
Figure 4: Launching the Autorouter
