eCADSTAR Schematic Editor Introduction
Welcome to the eCADSTAR Schematic Editor training guide. This training guide covers some of the most basic features of eCADSTAR Schematic Editor. It is consistent with the other eCADSTAR training guides, and uses the same design and library data. As you follow this guide, there are tasks to guide you through the design process. You can complete each task, or simply open the supplied designs at each step to continue at your own convenience.
eCADSTAR Architecture
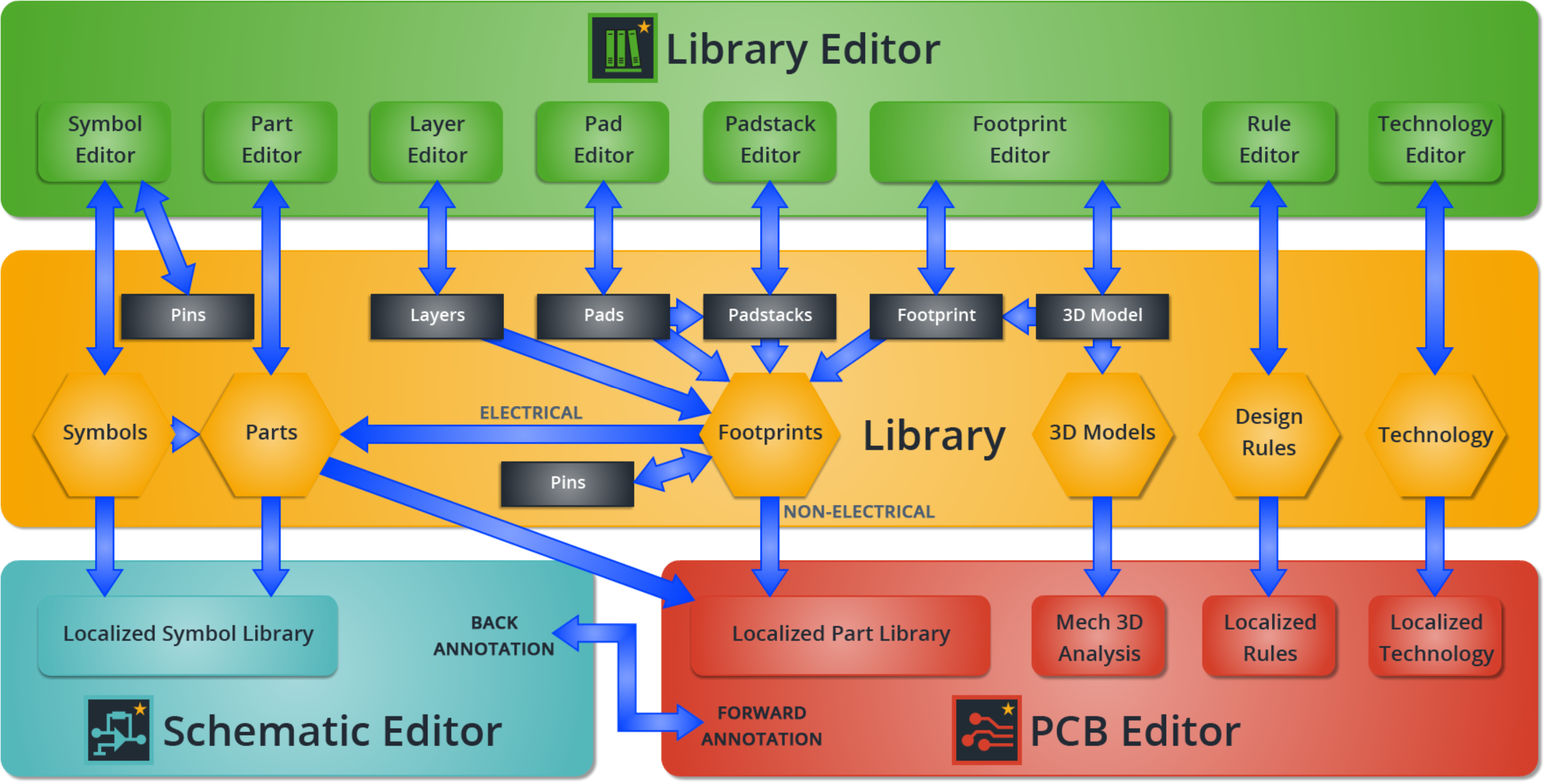
The diagram below shows the complete Library system and interactions with other eCADSTAR tools.

Figure 1: The Complete eCADSTAR System
eCADSTAR Library Editor can be opened from within the eCADSTAR Schematic Editor. The Component tab has a on the ribbon:

Figure 2: Accessing Library Editor in Schematic Editor
Library’s interaction with Schematic Editor
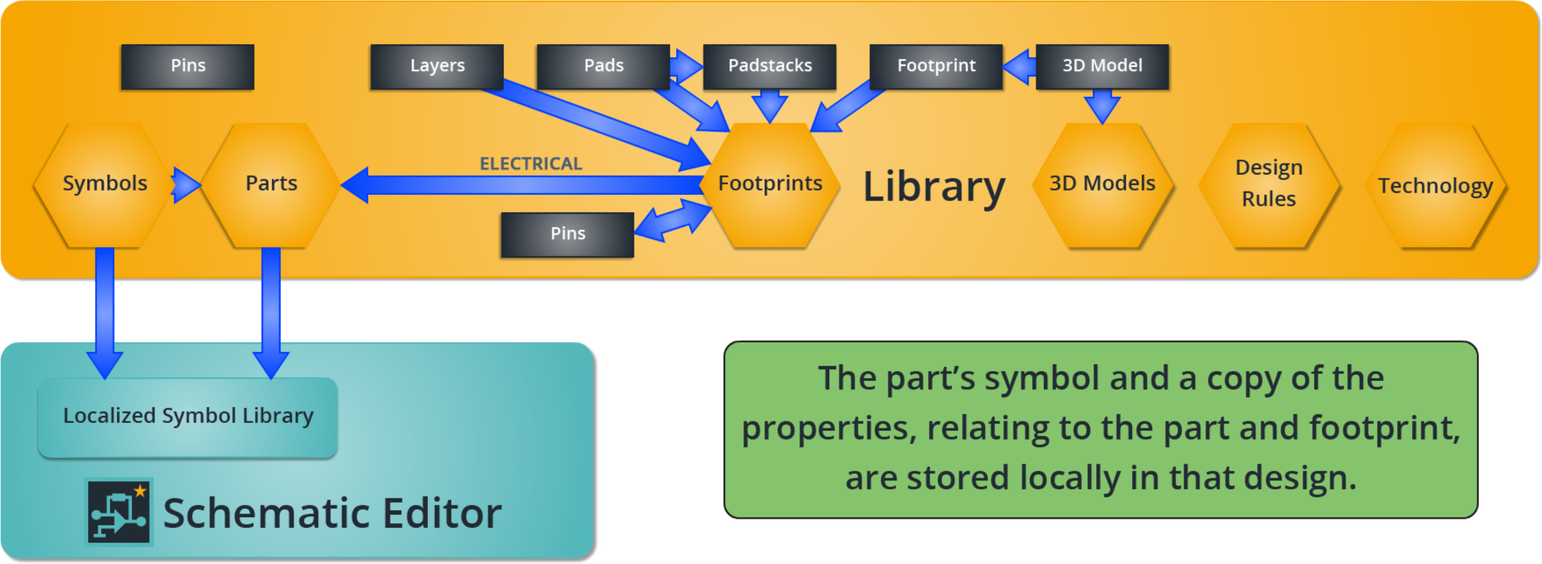
When placing a symbol on a schematic, a copy of the symbol is stored locally with the schematic data. You can also place a part on the schematic.

Figure 4: The Library's interaction with eCADSTAR Schematic Editor
Training Data
This guide uses the same training data as the other training guides. All required training data is installed at C:\Users\Public\eCADSTAR\eCADSTAR [version]\, in the following folders:
- Library comprising:
- Parts
- Footprints
- Padstacks
- Pads
- PCB Technology: the mapping from footprint layers to PCB layers.
- PCB Design Rules: spacings and other physical design rules.
- Symbols: schematic symbols for parts, gates and non-physical items.
- Designs\DIY_Training\SCH\DIY_Training\DIY_Training.sdes: contains the components and connectivity for the PCB. This is the data you will use in this guide.
When you complete this guide you will have a basic understanding of the capabilities of eCADSTAR Schematic Editor.

